

After you've signed up for your InvoiceBerry online invoicing account you will need to create your first client and invoice.
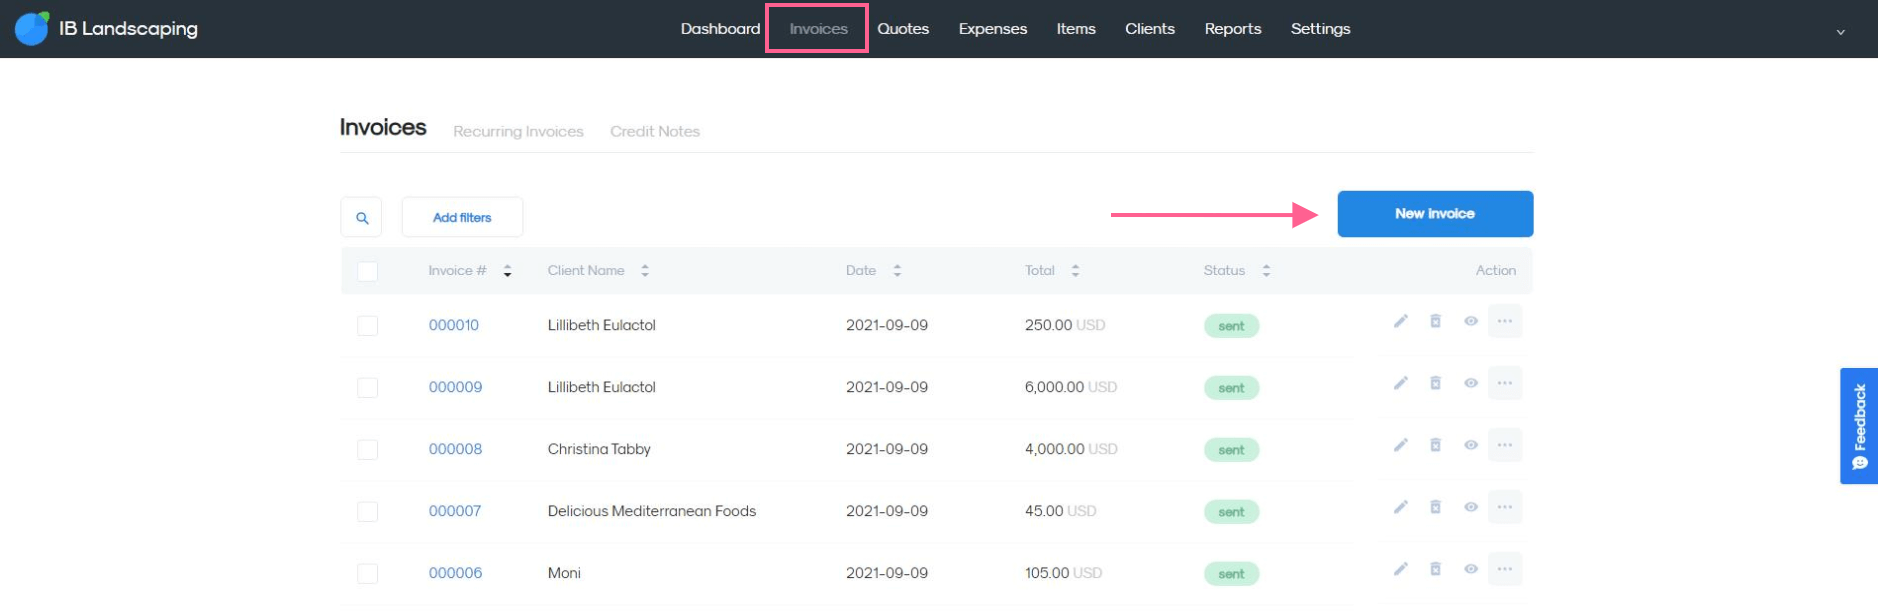
1. Go to the Invoices page.
2. Click on the blue New Invoice button.
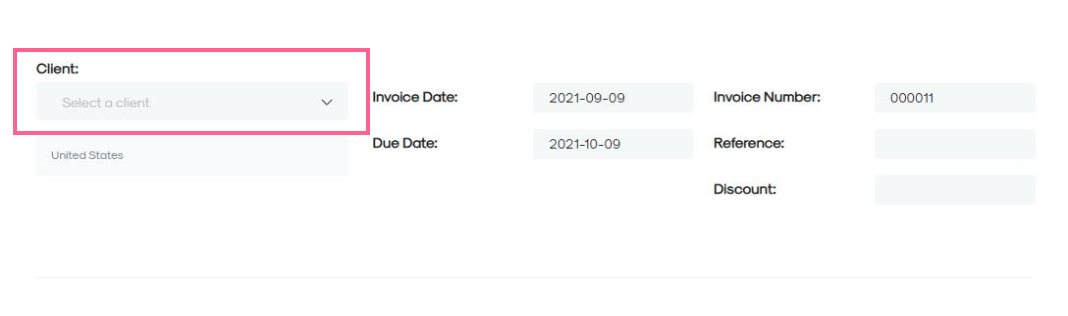
3. In order to create a client, click on Client and then select + Add New on the dropdown menu
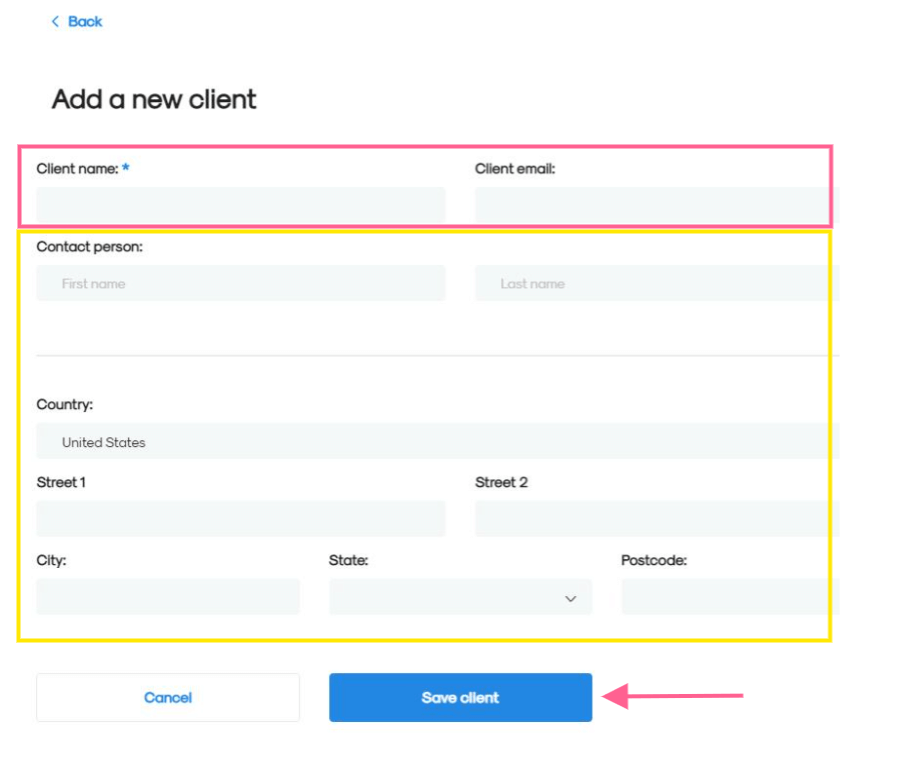
4. Add your Client's name and e-mail address.
Optional: add further details about your client.
Then click on the blue Save Client button.
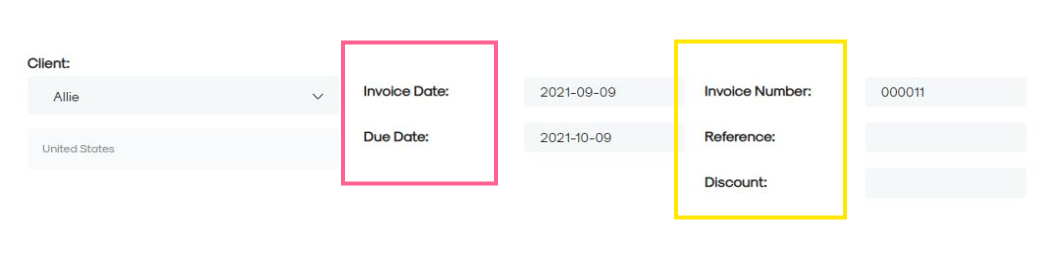
5. Select the Invoice Date and Due Date. Optional: edit the Invoice Number, add the Reference number and discount.
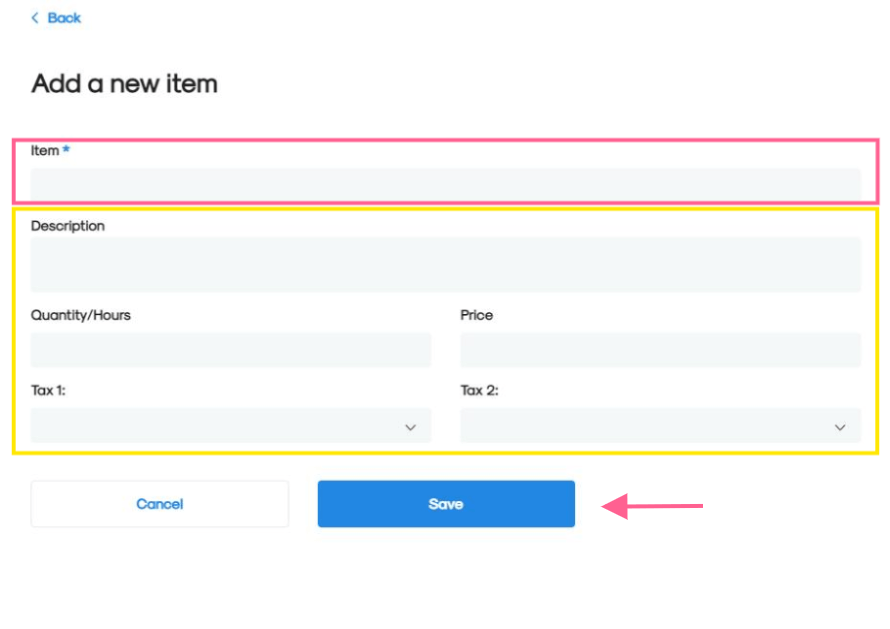
6. In order to create a new item click on Item and then select + Add Item on the dropdown menu.
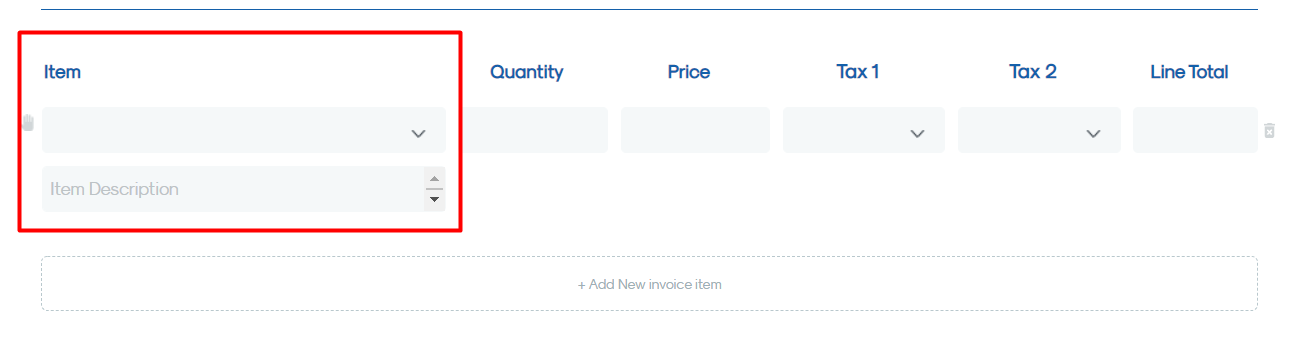
7. Add the Item Description then click on the blue Save button.
Optional: add a description, price, quantity and taxes from the dropdown list to the item description
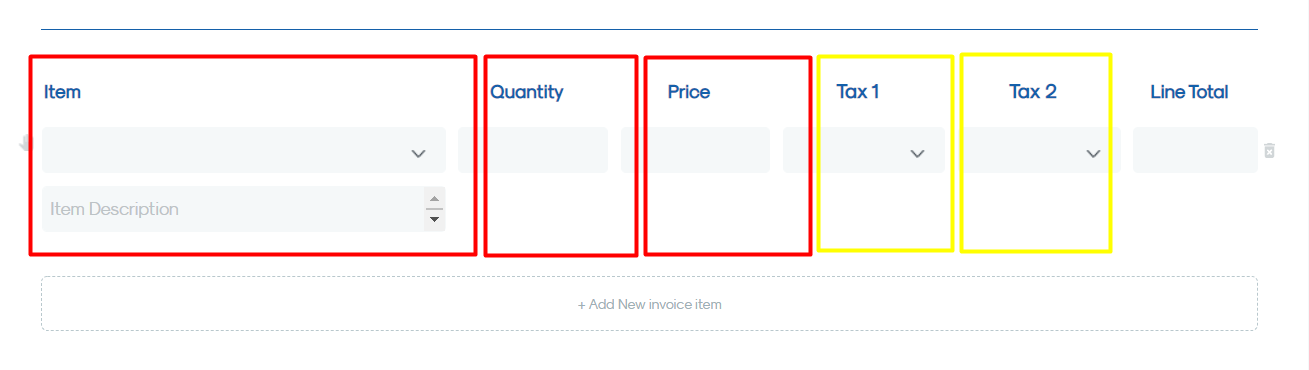
8. Add the Description, Quantity and Price if you haven’t already done so when setting up the item.
Optional: add taxes to your item description
 9. Add information to the Terms and Conditions section.
Optional: set default Terms and Conditions
10. Optional: add notes to your customer.
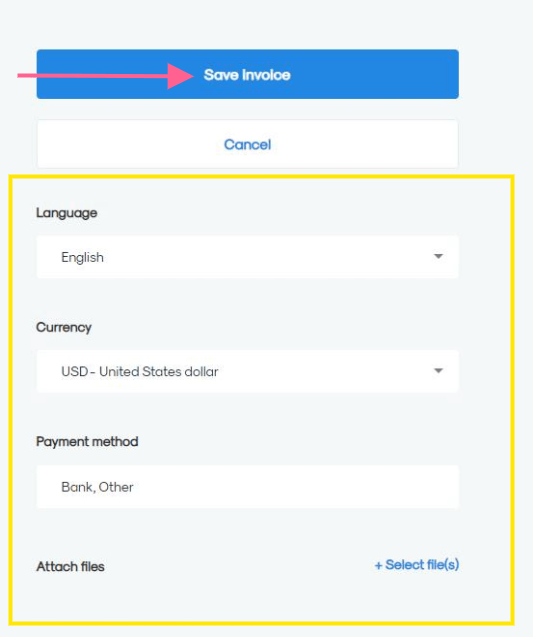
11. Edit the Language, Currency and Payment Method and Attach Files if necessary.
Optional: add another Payment Method.
12. Click on the blue Save Invoice button.
Congratulations! You've now successfully created your first client, item and invoice in one go!